|
|
|
|
|
Part 5: Stitch and Glue
|

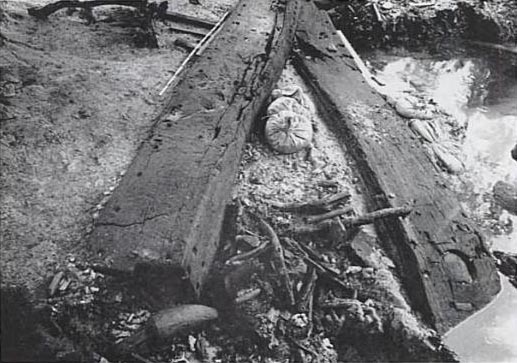
July 03, 2013  Doug Herman and Yoshi Sinoto at the Bishop Museum, 2011. Yoshi demonstrates a model of a voyaging canoe based on his findings at Huahine. The only solid archaeological evidence to support the great voyaging tradition that has otherwise been so totally verified—by oral tradition, linguistic evidence, computer modeling, radiocarbon dating, and contemporary voyaging—is two planks and a steering paddle dug up on the French Polynesian island of Huahine between 1973 and 1984 by Yoshiko Sinoto, an archaeologist from the Bernice P. Bishop Museum in Honolulu. The planks—from the sides of the canoe—were nearly 7 meters long, the steering paddle nearly 4 meters. Along the sides of each plank regularly spaced holes were drilled where it would have been stitched to the body of the canoe, and the ends were shaped to form scarf joints where they would have connected with other planks at the ends. The Bishop Museum radiocarbon dated the canoe pieces and other artifacts from the site to between AD 750 and 1100.
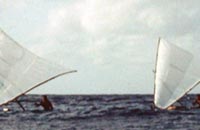
The stitch-and-glue technique of assembling a canoe is clearly both very old and very traditional in the Pacific. While people could have harvested a log large enough for a canoe, the dimensions of a canoe hull are much taller than they are wide. Have a look at the photo below of a Marshallese canoe on Majuro. Looking head-on, you can see that the hull is a very steep V-shape. This differs considerably from the dugout canoes of other cultures. These steep-sided canoes were made to be sailed, to be fast and efficient like a knife through the water. The easiest way to achieve this shape is to use a log that is not so big around and then to shape planks and other pieces to extend the height of the sides and perhaps the front. Here (below, left) is a photo of a lovely Carolinian canoe at the Commonwealth of the Northern Marianas (CNMI) Museum of History and Culture on Saipan. Note how the bow reaches towards the sky and then splits into a V at the top. To get this height, the bow is made of an entirely separate piece of wood, attached at an angle to the rest of the hull. The gunwales, similarly, have been made of separate pieces and stitched on. |
||

 |
||
The technique is pretty straightforward, though the details can get complicated: the pieces are shaped to fit together, holes are drilled, glue and caulk are applied, then the pieces are placed together and stitched. The stitching may remain in the end, or not. I had the pleasure of interviewing Daniel Dig, the last canoe builder on Ulithi Atoll, Yap State, Federated States of Micronesia, while he was at work on a small fishing canoe. You can see in the first image below that the canoe has stitching. A close look at the grain reveals that what may at first appear to be a crack in the original log is actually a seam between two entirely different pieces of wood. Other stitching attaches the gunwales and the bow piece.
The bow of Daniel's canoe. Here you can see how Daniel has stitched at least three pieces together to make this canoe, including the protruding, skyward-reaching bow piece that is the hallmark of Carolinian canoes. Daniel worked with “modern” but limited tools: a metal adze and a stone to sharpen it on, an old hand drill, and a wooden hand mallet. Perhaps he had a saw somewhere that I didn't see, but as there is no electricity on this island, I can be sure no power tools were involved.
 
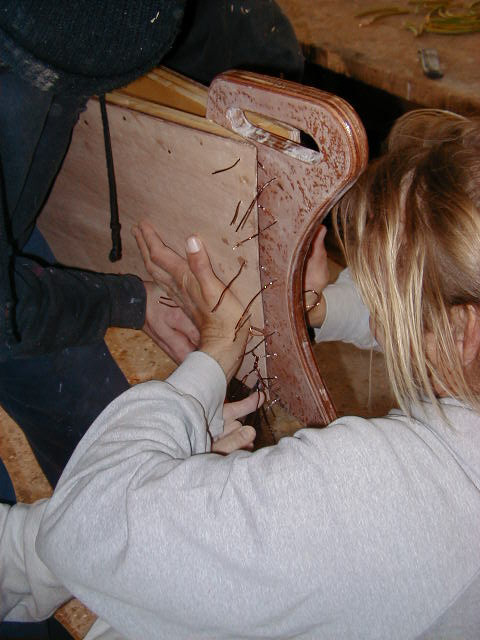
I didn't get to see the actual stitching-and-gluing part of this process, so I don’t know what he used for glue. I do know that all over the Pacific the white, sticky sap of the breadfruit tree was used, along with the pulpy husk of young coconuts as caulk. This is well demonstrated in the excellent documentary The Navigators: Pathfinders of the Pacific, which shows Mau Piailug and his fellow Satawal Islanders building a canoe in the traditional manner. A little more than a minute into this clip from the film, the builders have a blob of the white sap on a stick, set on fire like a burning marshmallow, which they use to smear the sap onto the edges to be glued. Now you can see that having stitched and glued the gunwales, Daniel has driven wedges into the stitches with his hand mallet. This pulls the stitches very tight while the glue hardens. Later these temporary stitches will be removed and replaced with something more permanent. You can see these finished seams a little lower on the boat where Daniel stitched pieces of wood together to make the hull—very attractive, tight, countersunk bindings. In the case of my canoe, the hull is built entirely out of pieces stitched and glued together. For stitching, I am using mostly 18-gauge copper wire (16-gauge for the tougher areas). After drilling holes along both pieces to be connected, you thread a piece of the wire through from the inside until both ends poke out the bottom. Then you grab those ends with pliers, pull hard and twist. Then grab it again, closer to the hull and twist it again. This pulls the stitch very tight, and since it is made with wire, you don’t need to drive wedges in to keep it tight. It will stay. I am going to talk about the gluing part in a subsequent post, since in my case, most of the gluing comes after the stitching. But you will notice that I've coated the interior of the canoe pieces with epoxy, so they are now dark and shiny. More about that later as well. Now, let’s stitch this thing together!  Time-saving jig. Step one is to drill the holes. I created a little “jig” out of scrapwood and marked lines on it at ¼ inch. This is the distance the holes are supposed to be from the edge of the boards.Then I drilled two holes, four inches from each end, so I can quickly and easily drill evenly spaced holes ¼ inch from the edge. The jig has two holes so that it can be used in either direction. This made for very fast and even work.
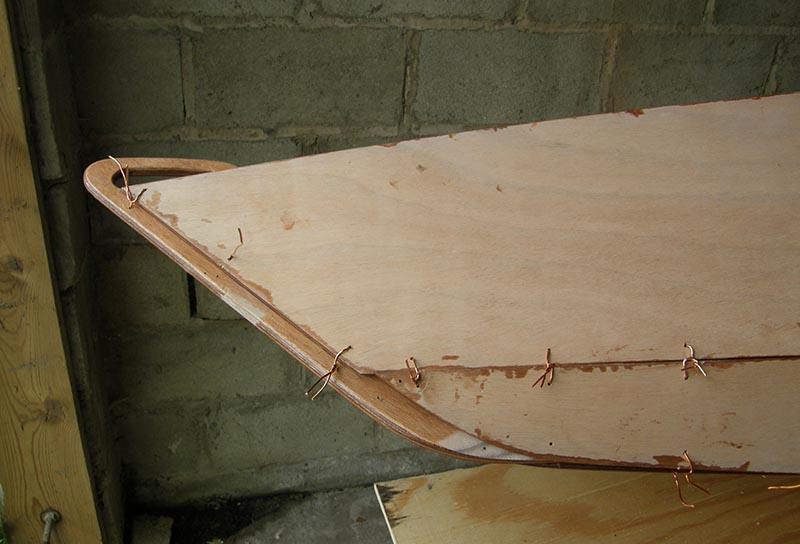
The canoe comes together. Here (clockwise from the top right) you can see one of the two bottom pieces all drilled. Next, I stitched these bottom planks together most of the way, adding two braces—one for under each seat—that help hold the two bottom planks at the correct angle. These braces are also stitched and glued. I didn’t stitch the bottom planks all the way to the ends because I figured the ends—the bow and stern—were going to be tricky. I had no idea…. In the next picture you can see that I'm attaching the first of the two side pieces to the bottom of the hull. In the background of the last photo on the series (bottom left), you can see that I've looped a rope around the end to hold the pieces in place while I work to finish fastening on the side planks up to the ends, and I was rejoicing in how easy it was. Everything is going very well at this point—easy as pie. Moreover, it's exciting to see these apparently random pieces of plywood suddenly coming together into something that’s starting to look like a canoe! Then I got to the bow and stern. Here the pieces that make the bottom of the hull twist almost 90 degrees—from mostly flat to totally vertical—and they did NOT want to bend easily. Plus there is that extra piece on each end that has to be threaded in.
 Hey, it looks like a canoe! Now at last you can see the entire hull all stitched together. I have, per the instructions, installed the seats temporarily to push out and hold the canoe in its appropriate curved shape, otherwise it would be very narrow. There’s still work to be done to finish it off, but those scraps of plywood are clearly turning into a canoe. A great feeling of satisfaction. —RDK Herman |
||
|
Next: Part 6: Sanding and Gluing
|
||

|
||


Copyright 2016, Pacific Worlds & Associates |
