|
|
|
|
Part 4:
|
June 18, 2013
|
||
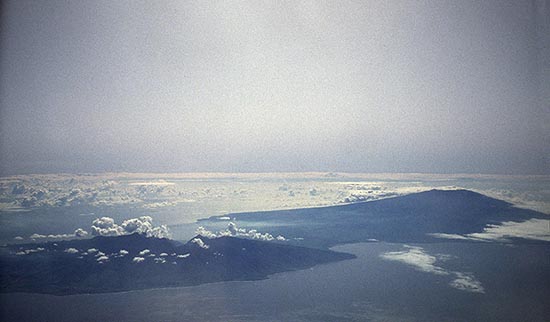
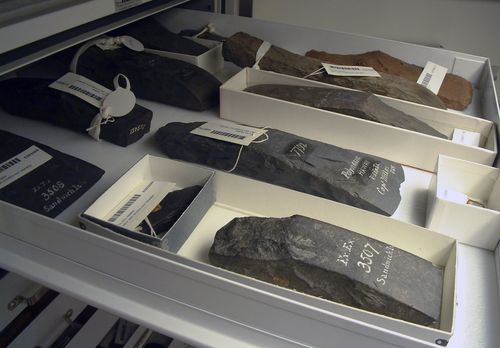
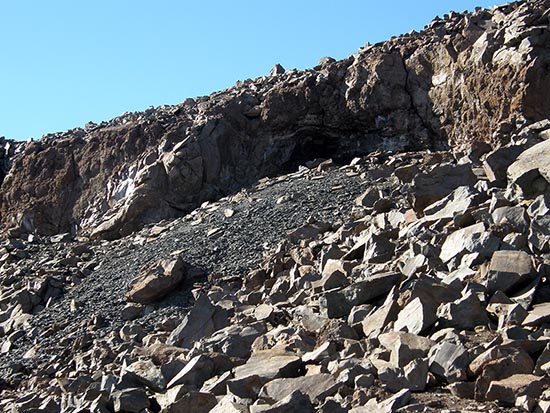
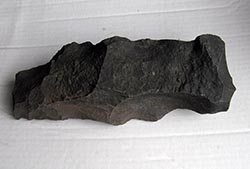
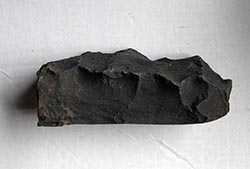
Except for large continental chunks that make up Aotearoa (New Zealand), the island of New Guinea, and adjacent chunks of Melanesia, most of the Pacific Islands are purely volcanic in origin. Hence there are no usable metals. Just rock—lava rock. And on coral atolls where the volcanic part has sunk beneath the sea and the coral reef has kept growing at the surface, there isn’t even lava rock. So what do you make tools out of? First of all, lava rock is not all created equal. Depending on the mineral content of the eruption and how fast the lava cooled, there are a wide range of densities and textures of lava rock. The stuff on the surface and outer edges cools fairly quickly and loses a lot of dissolved gases in the process, making that very porous, light and crumbly stuff. But down deep inside the lava flow, where it cools slowly and gases can’t escape, the resulting rock can be quite hard and dense. Different stages of mountain-building also produce different qualities of lava, the earlier stuff being very runny and the later stuff being, at times, quite thick and pasty. On the top of Mauna Kea, a mountain on the island of Hawai’i that rises close to 14,000 feet high, a late-stage eruption came out under a glacier that capped the mountain in the last ice age. This stuff cooled super-hard and is the best tool-making rock in the Pacific. Hawaiians of old probably found samples of it washed down in the streams and traced it back up to the top of this mountain. Today there are numerous shrines and workshops visible, a testament to the extensive tool-making that took place up here until westerners arrived with iron. In much of the Pacific the main tool was the adze. Adzes are not so much chopping tools as planing tools, shaving off chips a bit at a time to shape wood. But there were several types of adzes, including a set for chopping down trees. And Hawaiian adzes are, to me at least, particularly lovely and amazing. There is a beautiful collection at the Smithsonian National Museum of Natural History. Here is a selection collected in the islands in the early 1840s by the U.S. Exploring Expedition and accessioned by the Smithsonian in 1858.
|
||
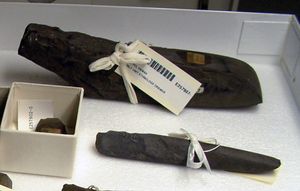 In this image you can see a nice blade as well as a small round chisel. The chisel would be used for cutting holes to lash the canoe together. In this image you can see a nice blade as well as a small round chisel. The chisel would be used for cutting holes to lash the canoe together.
|
||
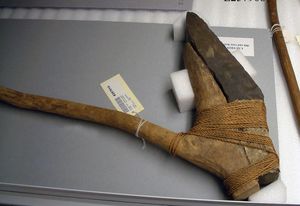 This is a lovely hafted adze. The blade is fasted to the handle with coconut sennit. That piece of fabric beneath the twining is kapa (bark cloth). This helps absorb shock, keeps the bindings tight, and prevents the rope from being gnawed away by the rough stone of the blade. These tools were collected by Nathaniel Emerson and purchased by the Smithsonian in 1909 following the close of the Alaska–Yukon–Pacific Exposition in Seattle. This is a lovely hafted adze. The blade is fasted to the handle with coconut sennit. That piece of fabric beneath the twining is kapa (bark cloth). This helps absorb shock, keeps the bindings tight, and prevents the rope from being gnawed away by the rough stone of the blade. These tools were collected by Nathaniel Emerson and purchased by the Smithsonian in 1909 following the close of the Alaska–Yukon–Pacific Exposition in Seattle.
|
||
|
Making these blades is an incredible test of patience and perseverence. Once you’ve found the rock you think is suitable, you start chipping away at it with another piece of hard rock. Now every blow with this “hammer stone” creates a cone-shaped shock in the potential blade rock, like those shatter cones you sometimes see in car windshields. So you have to plan your blows to flake off bits of cone in the right direction. One wrong blow and the piece is ruined. There are piles of discarded attempts atop Mauna Kea. Or perhaps the stone had a flaw and just cracked. And you might be almost all the way done when this happens! I’ve been to the top of Mauna Kea. Mind you, in Hawai‘i that means starting at sea level. At over 13,000 feet, the air is really thin and just walking can be strenuous. And it’s cold, and Hawaiians didn’t have much in the way of cold-weather gear. So my hat is off to those who went up there and worked.
Dr. Peter Mills, an anthropologist at the University of Hawaii Hilo Campus and a flint-knapper (a similar stone-on-stone process, but for making flat blades like arrowheads and spear points), postulated to me that probably apprentice adze-makers—younger guys, in other words—did the arduous work atop Mauna Kea, and brought down roughed-out blades to the master adze maker to finish. It makes sense to me. Still, I can’t imagine how these guys could walk down from 13,000+ feet carrying big chunks of rock.
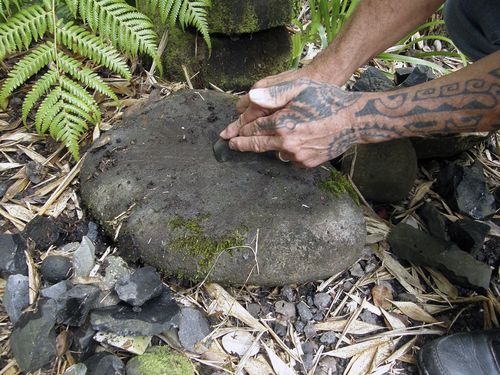
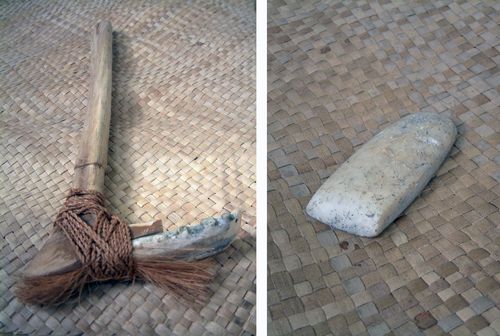
Tom Pico, a contemporary adze-maker at Volcano, Hawai‘i, showed me how the blades would then be ground on a flat lava rock using sand and water. Green sand high in olivine content makes the best, he says. And these blades would have to be sharpened constantly on a flat stone. Perhaps the master canoe carver had an apprentice next to him sharpening his blades for him. And on the canoe itself, you’d need the adzes, the sharpening stone, and the sand, because as Tom pointed out, this was your “fix a flat” kit aboard the canoe. Tom Pico demonstrates sharpening a stone blade. But what if you live on a coral atoll with no volcanic rock? Then your hardest substance is shell, and the best shell comes from the giant clam. If you’ve never seen a giant clam except in cartoons and movies, you should know that these beautiful, shy creatures are truly magnificent. There are different species, with the largest getting up to four feet long and 500 pounds in weight, living over 100 years. It’s the base of the shell where the hard stuff is. What it would take to begin with a big chunk of shell and get a blade out of it I do not know. Also the inner core of species of conch can be used for adze blades, though I imagine they are not as good as giant clam. Below right is a picture of a lovely giant clam blade given to me by my friend Mariano Laimoh on Ulithi Atoll, and an adze with a spider-conch blade made for me by Steve Tilwemal of Ifalik, using an old blade he said he found lying around.
Stone blades were largely abandoned soon after Western contact and the introduction of iron blades. Mau and Tava used iron adzes for most of the work on the hull of their canoe, but also stone adzes. Why stone? Well, a stone adze with its planing action takes off very fine shavings of wood. For fine finishing work, this is preferable, for at that stage, one wrong swing with an iron adze could cut too deeply into the hull and ruin it. Sometimes these old technologies are the best. Further resources:
Next: Part 5: Stitch and Glue
|
||

|
||
Copyright 2016, Pacific Worlds & Associates |
