
|
ManaiakalaniModel Voyaging Canoe based on Hokule‘aRDK Herman, 2017 |
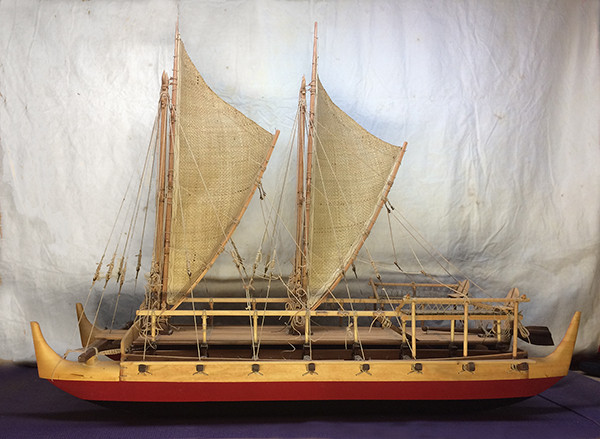
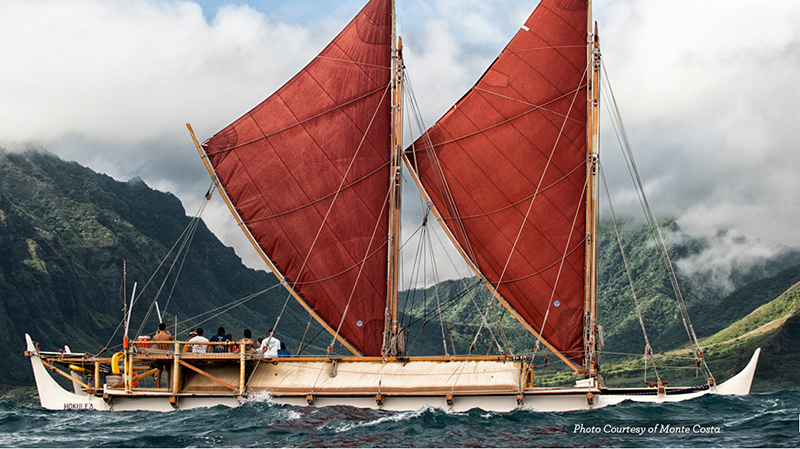
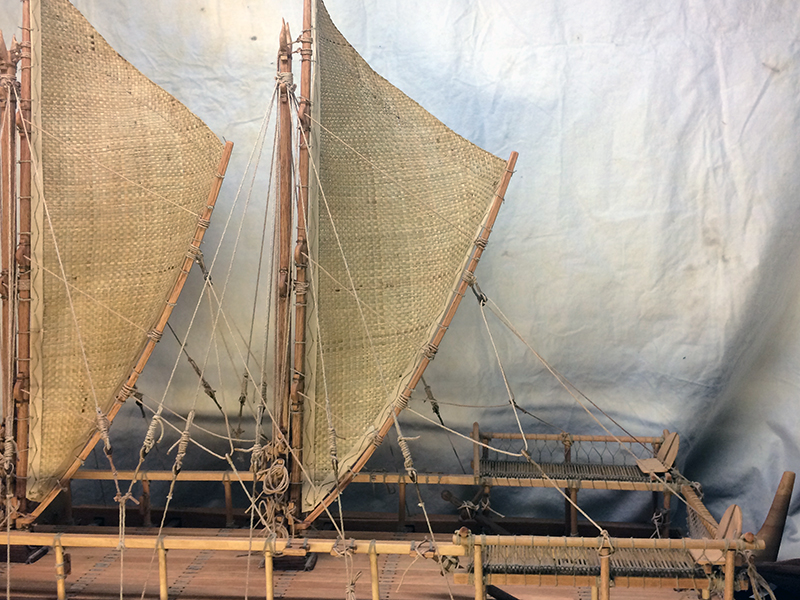
SAILS & RIGGING: Hokule‘a has had many different sails, as far as I can tell from the photos. Crab claws on the original 1976 voyage, then Marconi rigs, then different crab claws more recently. I chose this recent photo as my guide, and initially cut out shapes from poster board to figure how to get the best curve. I had known all along that I would be using lauhala matting for the material, and had some nice fine-weave matting available for that purpose.
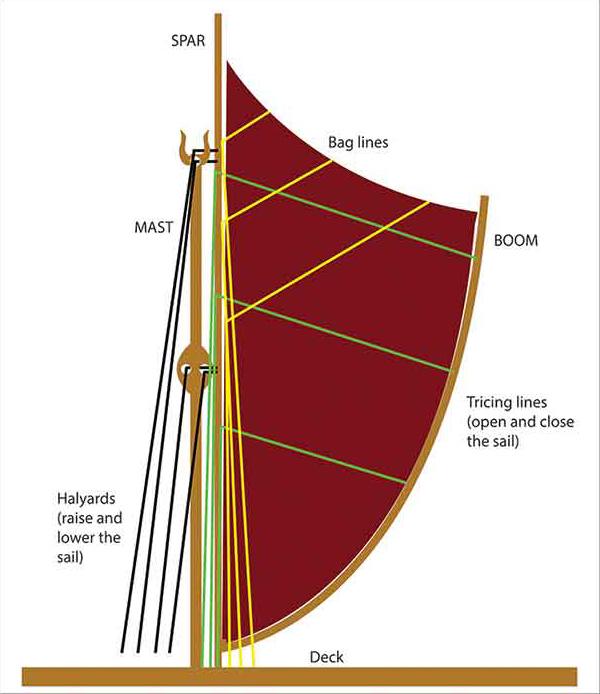
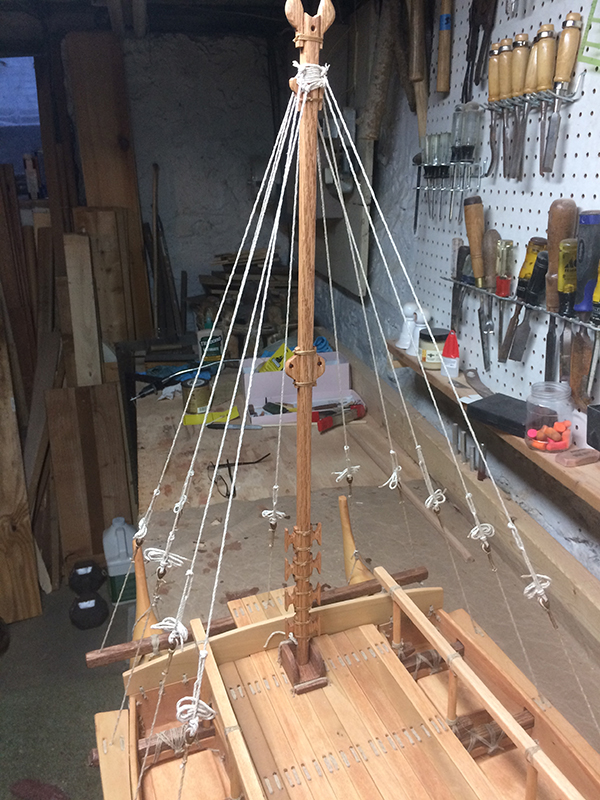
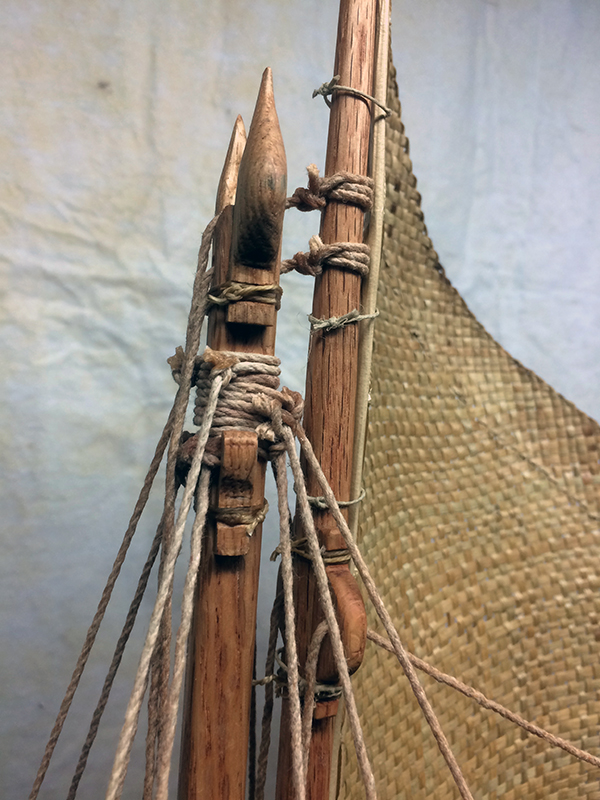
Since the crab-claw rigging is different from the usual Marconi rig, it might be useful to explain the parts and terms. There are masts, which are fixed with stays (a lot of ropes holding them into place from different angles. The sail is not attached to the mast, but to two other pieces: the spar, which lines up against the mast, and the boom, which swings outward and away. To take down the sails, one lowers the spar & boom combination. To close the sails, one pulls "tricing lines" that bring the boom up to the spar. On Hokule‘a there are also "bag lines" attached to the top of the sail that help bunch up the sails when they are being closed.
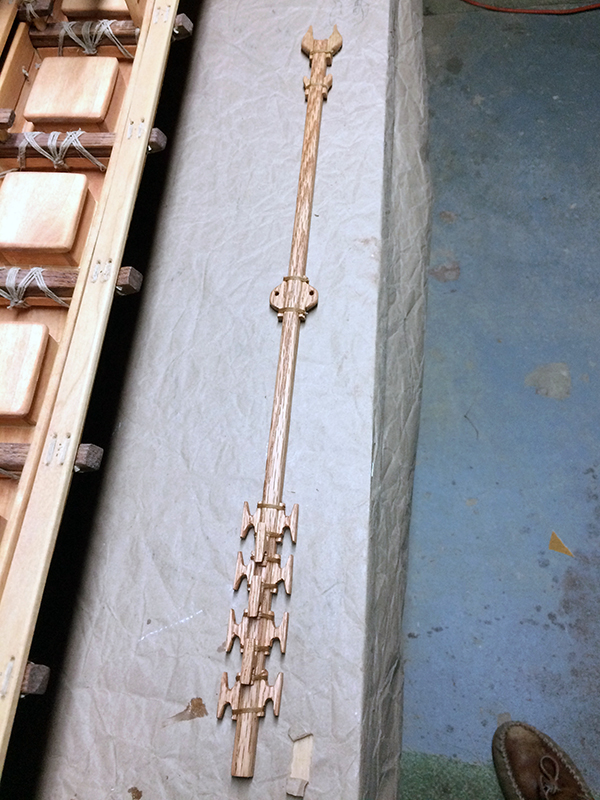
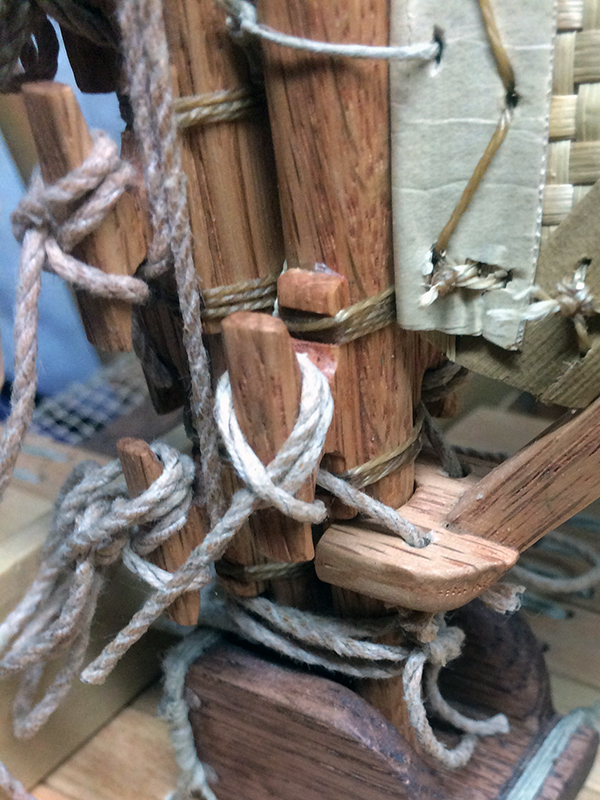
This image shows how two of the halyards go through the pepeiao in the middle of the mast, then at the top, one through the pueo and one over the top of the pueo. The tricing lines, that open and close the sail, also go through pairs of pepeiao, not shown in this image. Since my sails are stiff lauhala and not softer canvas, and given the scale of the model, I did not include bag lines. The masts I made from oak, ripping pieces about 1/2 inch square. I rounded the edges but did not make them totally round, since they are not totally round on Hokule‘a.
|
|
|
|
|
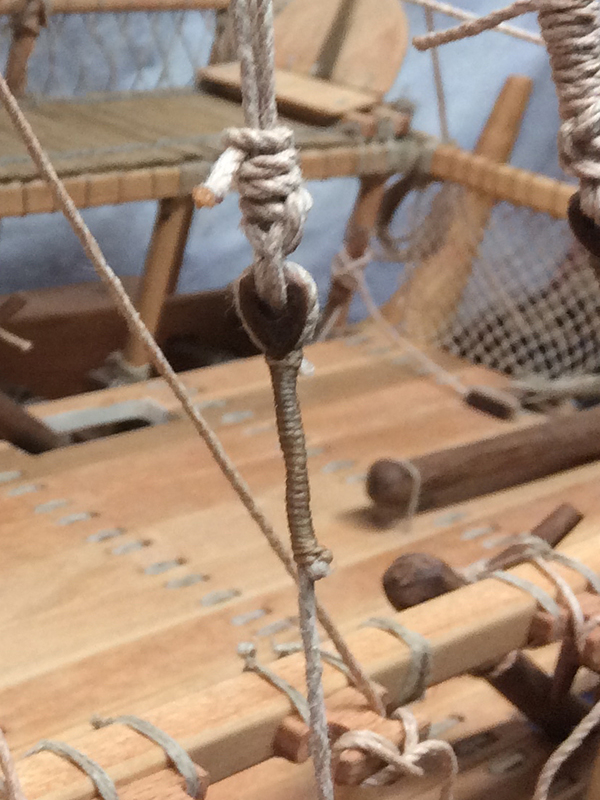
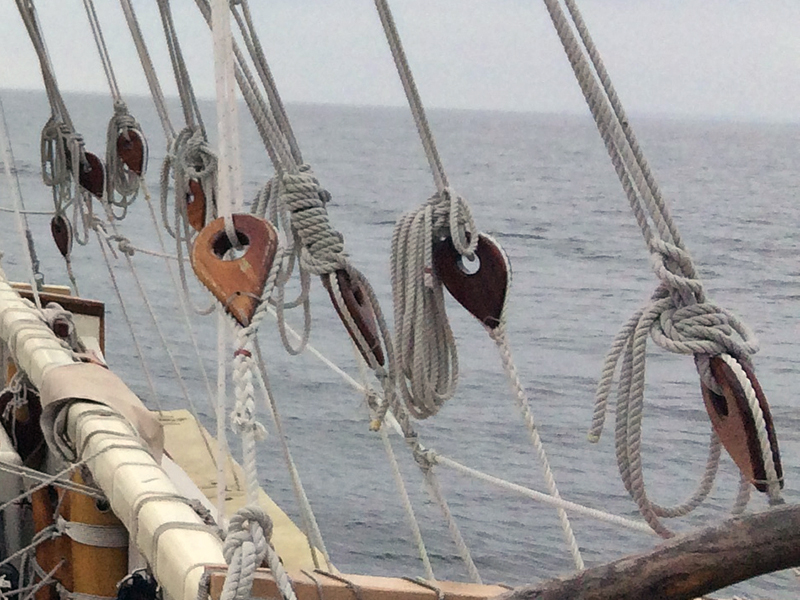
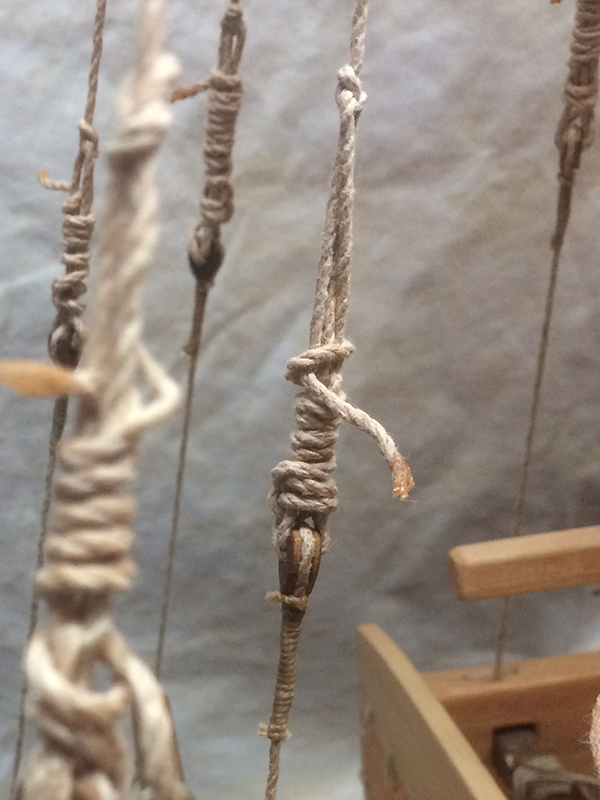
I used 2 mm hemp cord for my stays and rigging lines. What I bought was billed as "natural" color, but once I had put up the first mast, I decided it simply looked white—too white! So I made a solution of the wood stain I had used for the deck, and gave it a quick rinse. Once dried, it was not too stiff, and had a nicely faded color. The stays are attached up below the pueo, on top of a pair of small pepeiao ("ears") to keep them from sliding down. Each rope has an in-line bowline knot tied in it. Then there is a separate rope that comes up from the ‘iako. This one has a small, tear-drop-shaped wooden piece with a groove around the outside and a hole through the middle. On Hokule‘a, if nowhere else, these are called "doughnuts." The rope from the bottom goes around the doughnut and is lashed tightly to hold it in place. I dreaded the thought of having to hand-carve all these doughnuts, and as luck would have it, I didn't have to. There are commercial businesses that cater to model ship builders, and I managed to purchase a few packs of what they called "hearts." They are not quite large enough to be to scale, but they worked. And I didn't have to make them!
|
|
Doughnuts on Hokule‘a |
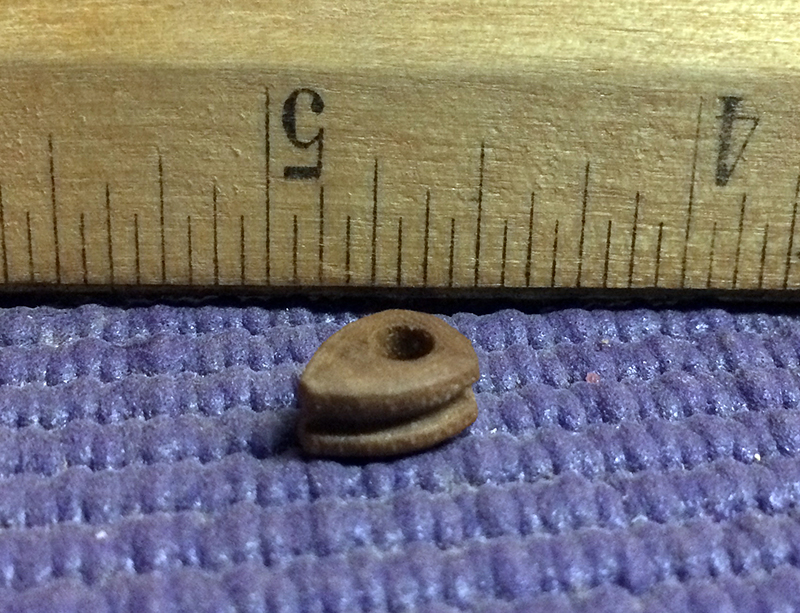
Hearts on the model |
 |
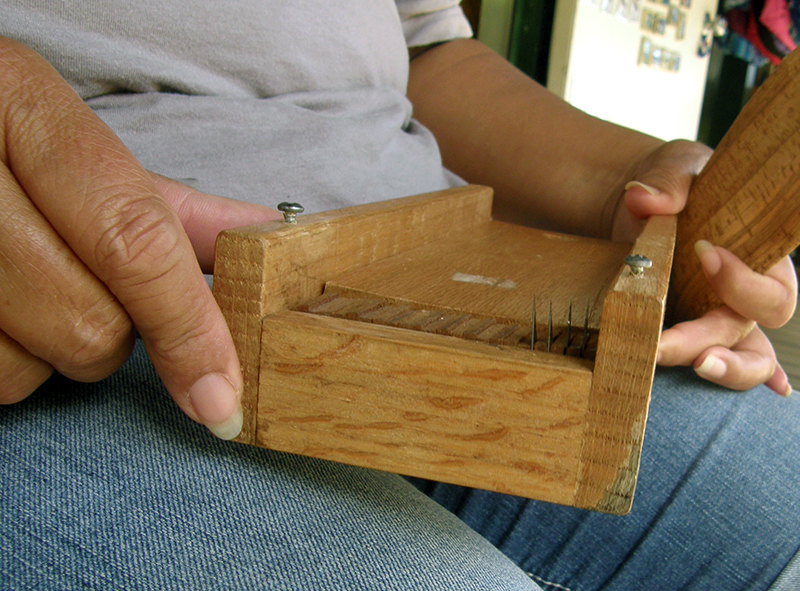
Pretty small, eh? |
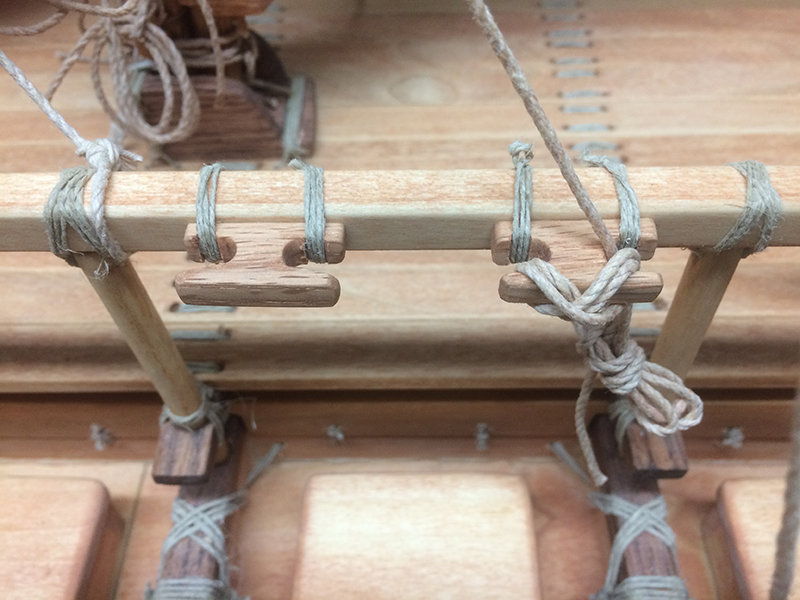
These hearts are pretty small, as you can see. And what's more, lashing them really requires three hands. That's why clamps exist. Here is a picture of my set up. The upper clamp holds the heart while I put the string around it and lash it tight. Of course, there was figuring how to do the lashing. I consulted this blog, which was very useful, and found some other drawings online as well. I chose to use the waxed whipping twine.
|
|
 |
 |
Now to put the mast up, I set up all the lower ropes with the hearts. Then I made all the upper ropes with the bowlines in them, and tied them to the mast. Then I took the tails of all the upper ropes and ran them through the hearts, then back up and through the bowlines, then back down and through the hearts again. The tension was, for the most part, tight enough to loosely hold the mast in place. Then I went around tightening each of these stays until the mast was straight and taut. Each one was then finished off with two half-hitches. The tails of the upper ropes I at first tried simply bunching up. The string just didn't hang in nice coils, and making those tiny coils was pretty frustrating. Later, and following some old picture of Hokule‘a or one of the other canoes, I decided to wrap them around the stays.
|
|
|
|
Now I was ready to make the sails, with their spars and booms and assorted pepeiao. For the spars I ripping oak pieces a little less than 1/2 inch square. Again, I rounded the edges but did not make them totally round, since they are not totally round on Hokule‘a. Then I rounded and tapered the tops, and lashed on the pepeiao. For the booms, I ripped a thinner piece of oak, still somewhat square, as this is how they are on Hokule‘a. I then put them over a steam kettle to bend them, which took a while, and it was tricky getting them to have the same curve. I then had to make the little parts that go on the bottom of each boom, to link it to the mast. Because, as I said, there have been a lot of different sails on Hokule‘a, I decided to go with this shape, the most current version of the crab-claw:
I also used this image to figure out how to do the sheets that manipulate the sails. We almost never used the sails when I was on Hokule‘a—there wasn't much wind, so we were towed almost the entire time and I never really noticed how the sheets were rigged. To make the sails, I first—using a mast-and-boom combination—cut a shape of poster board. This I affixed the the mast and boom using masking tape, to see how well the shape worked and to ensure that it billowed out in the way I wanted. It took two tries. Then I set about cutting the sails out of a fine-weave lauhala mat I happened to have. The issue I knew I was going to face was doing something with the cut edges of the mat. I wanted to weave them back into the mat, but an early experiment in doing that showed I did not have the skill. Finally, I looked at two model canoes in my possession, one Carolinian canoe and one Marshallese canoe, and saw that the artists had used wider strips of lauhala, folded them over the edges, and neatly stitched them. I had prepared to do something like this and gathered some dead lauhala with permission from my friends at Paepae o He‘eia (mahalo you guys!). I had previously been shown how to process these leaves from master weaver Tan Floren Meno Paulino at Gef Pago village on Guam. But it turned out to be harder than I expected, so I went onto YouTube and learned how to make a bamboo roller. This made it a lot easier! I had also seen how to set up an adjustable block with exacto-knife blades to cut the processed leaves into strips. Since I needed only one size, I took a one-inch piece of board and clamped a pair of blades on either side. This I ran down the length of my processed leaves to get 1-inch strips.
|
|
|
|
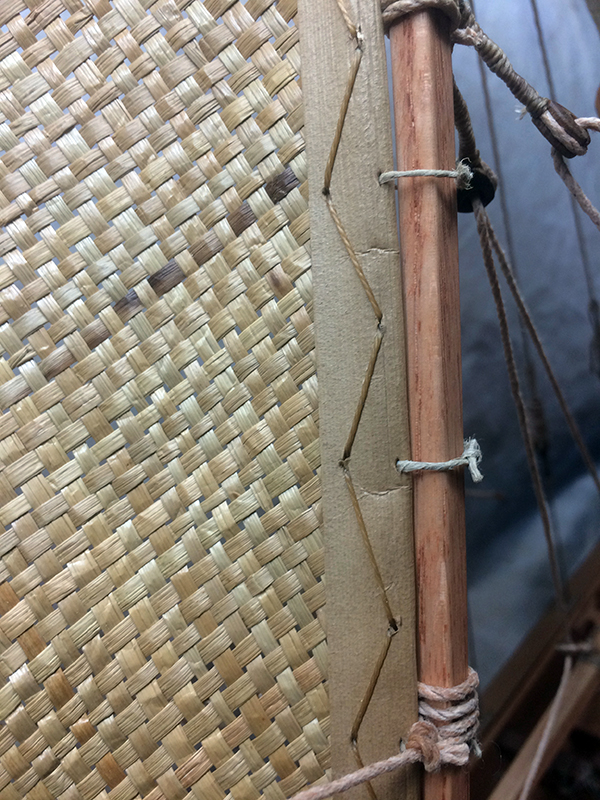
These I then folded over the cut edges of my sails, with a length of cord along the inside edge, as I had done for my outrigger sailing canoe. I then stitched on following my Marshallese canoe model, and using the waxed whipping twine. I then fasted the sails to the spar and boom with little loops, tied with square knots. This is how the sails on Hokule‘a were attached.
|
|
|
|
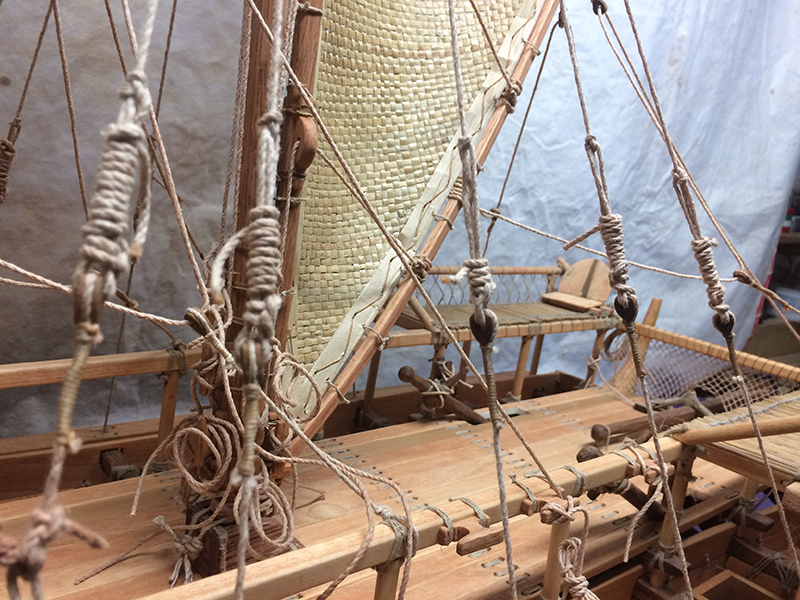
Now I had the great fun of attaching the halyards and tricing lines, running them through the pueo and pepeiao, and raising the sails!
|
|
|
|
All those halyards and tricing lines need to be long enough to lower the sails completely to the deck. That means that when the sails are up, you need to coil those ropes. My hemp string did not feel enough gravitational pull to hang nicely. Maybe I can figure out a better way.
|
|
|
|
|
Now I needed to attach the sheets, which, based on the picture I mentioned earlier (above), involved four more doughnuts per sail, and the positioning of cleats for fastening their loose ends. Again, this is not something I knew from experience, and I had to picture myself right down on the deck of this model. Where would these things go?
|
|
|
|
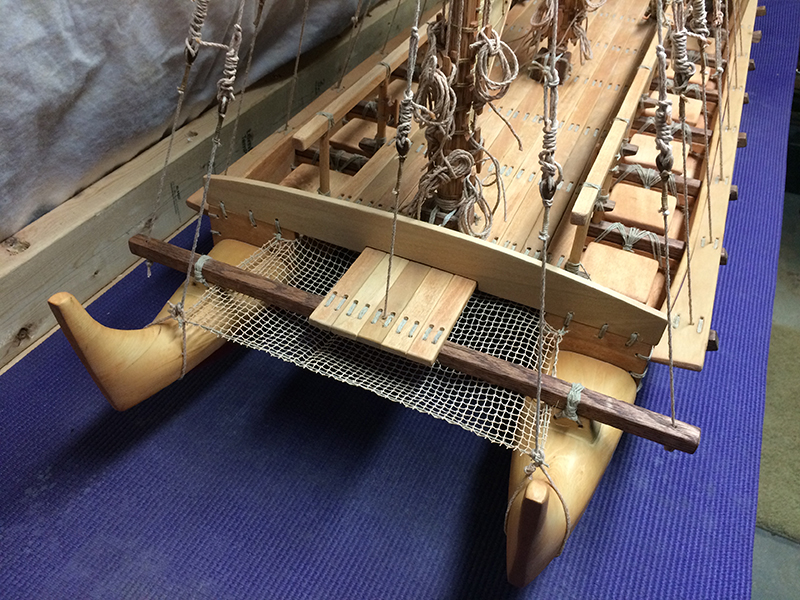
To finish this model, I needed some miniature netting. This was nearly impossible to find. I finally discovered a company that makes the netting for filet lace. This netting comes in a variety of sizes, and I got the smallest size they had, I think seven holes to an inch. This seemed to match what I saw in my photos of Hokule‘a. I did my best to attach these, front and back, even making the nice semi-circular hole for the steering paddle.
|
|
|
|
|
|
And that, my friends, finishes my model. I hope you have enjoyed this discussion of building Manaiakalani. Happy sailing!
|
|


