|
|
Pacific Islanders didn’t have cloth as we know it—woven with threads of fabric. Sure, there was “bark cloth” (known as tapa or kapa in Hawai‘i) but this is closer to paper than to cloth. In fact, it’s made from the paper mulberry tree (wauke, in Hawaiian) by much the same method as traditional paper-making. It is “felted” rather than woven, and not strong enough for a sail. On top of that, there were no large mammals on these remote islands from which hides could be utilized. Besides, animal hide does not do well in water, and sails do get wet. The answer was truly ingenious: leaves. That is, leaves of the pandanus tree (Hawaiian: hala), which are several feet long and very fibrous. Pandanus, sometimes called “screwpine” because of its corkscrew growing pattern, is one of the “canoe plants” that Pacific Islanders took with them on the canoes as they migrated across the ocean. Woven pandanus products are still used widely in the region, from small baskets and containers to large mats. And sails.
Tan Floren Meno Paulino on Guam (Tan is an honorific for female elders), a master pandanus weaver, explained to me the processing of pandanus for Pacific Worlds-Guam website. First, the leaves are picked and dried in the sun. Once dry, a simple tool is used to strip off the thread of thorns that run along each side. The leaf is then rolled into a coil, which sits for a while.
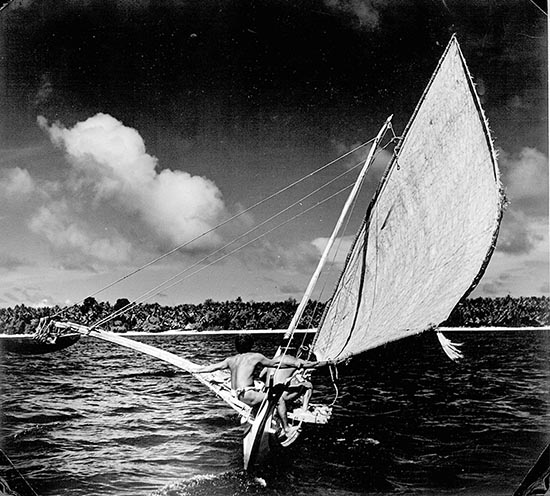
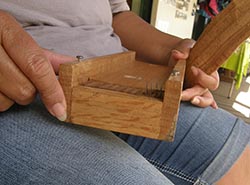
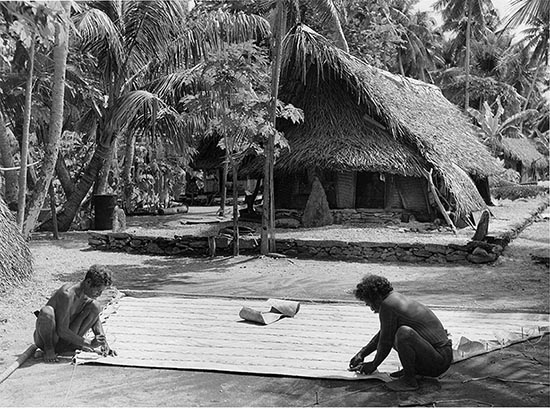
The leaf can then be pulled though a very simple device that slices it into even widths for weaving. These can be very fine (for small or detailed projects) or wide for mats and sails. Sharp blads are spaced evenly using little wooden blocks, and the leaf is dragged through it. Now pandanus mats are still pretty common throughout the Pacific. They are cheap and easy to make, last a long time, and are infinitely useful. But the standard over-and-under box weaving that is used to make mats is not the same as that used for sails. Samples in the Bishop Museum in Honolulu show that sail weaving used a twill pattern—over two and under two. This is said to provide more strength for flexing in heavy winds. One doesn’t see this much anymore. Sails were apparently made from a series of mats stitched together. Below is a WWII-era photo from Ulithi Atoll taken by Dr. Marshall Paul Wees, a U.S. Navy doctor stationed there during the War. You can see the men have staked out the sail pattern on the ground with pegs and string, and are then stitching together a series of strip-shaped mats into a sail. These days the process is more prosaic, since the fabrics are already available pre-made. Wharram’s Melanesia design uses what’s commonly called a “crab claw” sail, after its shape. This shape was common throughout much of the Pacific, though there is speculation that it was replaced in central Polynesia by the Micronesian-style sails like the one shown at the top.
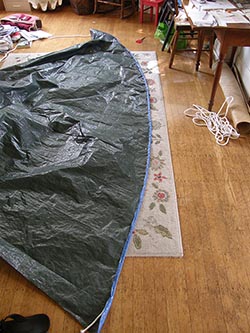
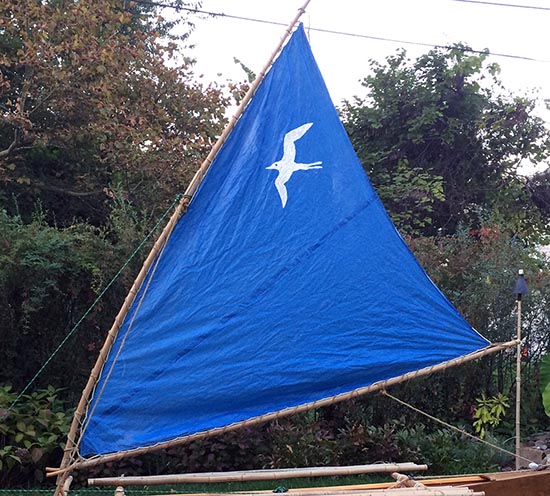
Because this is a cheap do-it-yourself project, my sail is made from common blue tarpaulin from the hardware store. It doesn’t look fancy, and it won’t last a terribly long time since the plastic breaks down in sunlight, but it certainly is inexpensive! I must admit, I thought making the sail for this boat would be the most boring part. A lot of stitching, stitching and stitching. After hewing logs into outrigger and booms, the idea of such minute work had little appeal. I was so wrong! Step one is to cut the sail shape out of the tarp. The instructions weren’t as clear on how to do this as I would have liked, but I managed. Here is the tarp after I had cut out the pattern.
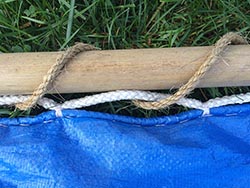
Next, you lay a rope along each of the two sides—the luff and the foot, if you must (but not the curve, or the leach). The edge of the tarp is then folded over and you use a very simple large stitch to attach this rope inside the tarp. I used polyester thread intended for exterior usage. So, I sat on the floor on this hot summer day in Baltimore, in my lofty apartment with 12-foot ceilings, opened the giant windows, and sat on the floor in my lavalava stitching this sail, listening to a CD of Micronesian chants. It was easy to feel that I was in a canoe house somewhere in the Pacific, doing what men have done for millennia: making a sail. It was wonderful. A second rope is then laid alongside the outside of the edge I had just stitched, and this is heavily stitched on every six inches. Basically, you are attaching loops of rope on the outside of the sail to the rope stitched inside the edge of the sail. These loops are what will be used to attach the sail to the mast and boom. A whole lot of stitching. The top edge of the sail is simply stitched for reinforcement, since it is not attached to anything. Now you can see the edge of the sail where it is attached to the mast. Clearly visible is the rope inside the material, and the rope stitched to the outside every six inches, creating loops. Another rope passes through these loops and around the mast and boom. It’s so easy even my five-year-old son could help.
And voila! A sail! I painted a frigate bird on it, because I named this canoe Nāmaka‘iwa, “eyes of the frigate bird.” |
||
—RDK Herman Next: Part 12: Rigging the Canoe |
||

|
||
Copyright 2016, Pacific Worlds & Associates |
